What if I told you that you can make animated overlays from your browser that beam right into your live stream?
Get ready to wave goodbye to huge media files as I show you step-by-step on how to create overlays that you can access anywhere.
No downloads. No new software required. Plus, I share a trick on how to get rid of their watermark. 🤓
IN THIS EPISODE, YOU'LL LEARN:
✅ How to Create Cloud-Based Graphics in 7 Easy Steps
✅ Over 20+ Amazing Templates You Can Use for Free
✅ How to Simplify Your Show Prep with Timers
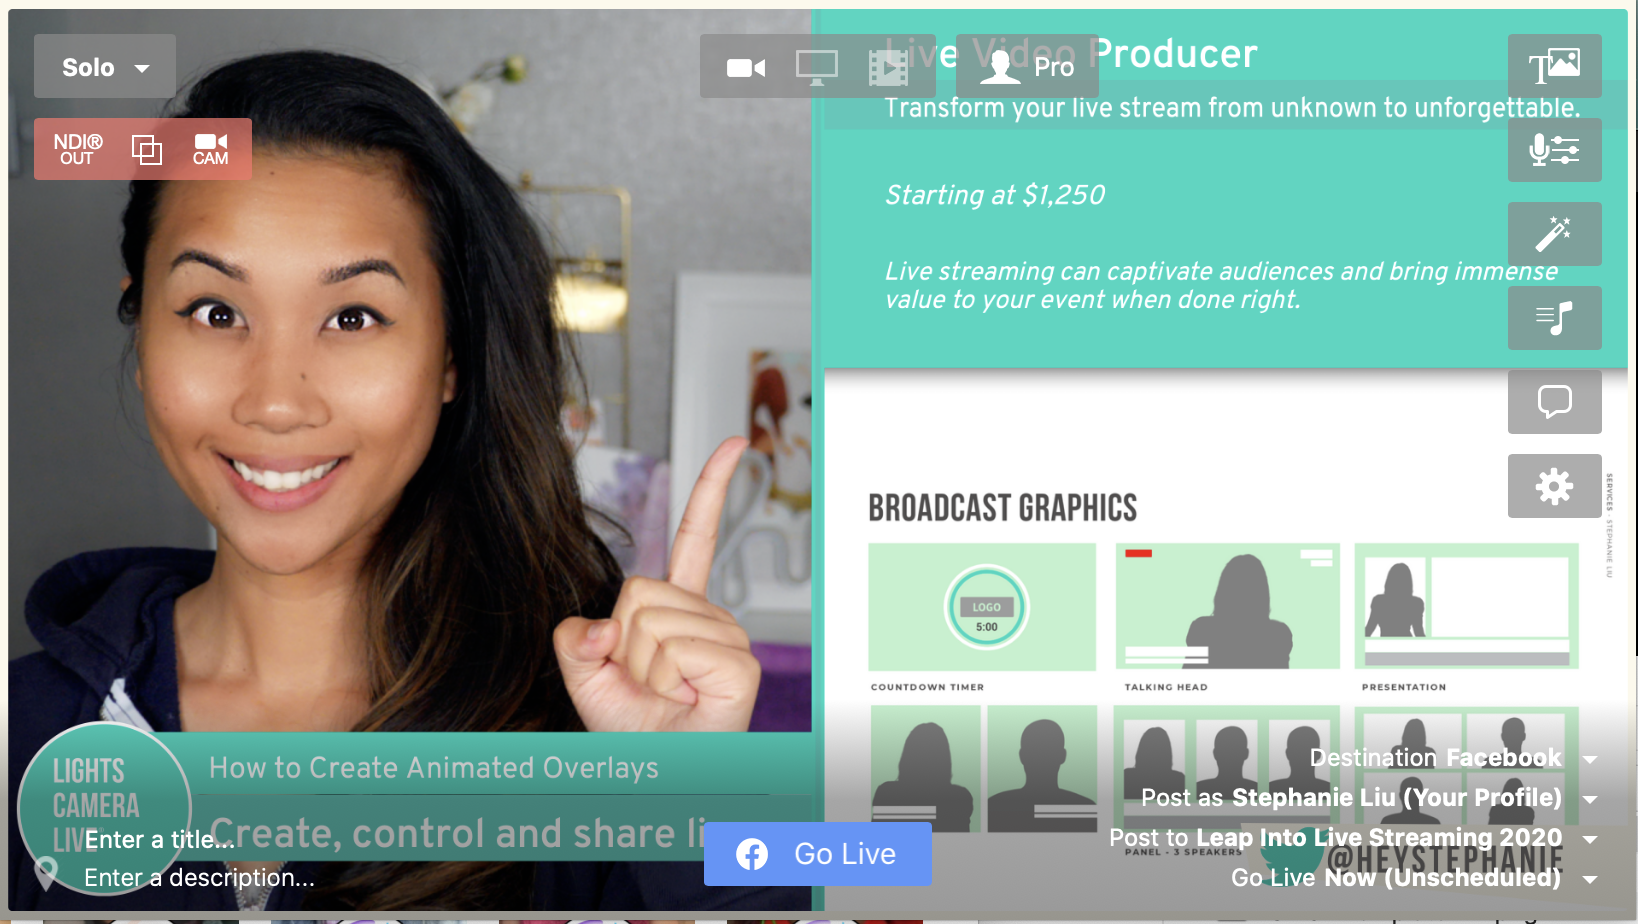
Captivate your audience with a stunning live video production without having to spend hours learning a new program!
Whether you’ve been live streaming for years or just getting started, by now you’ve realized the importance of having a branded live video production. Having custom overlays, logos, banners, and even countdown timers makes your show appear more polished and positively scroll-stopping.
Simply put, a branded show is what separates the amateurs from the elites.
In this tutorial, I’m going to teach you how to make professional overlays in as little as 10 minutes, without having any design skills. It’s as easy as picking a beautiful template, editing the copy, and swapping out images.
That means you don’t have to hire a designer or try to figure out expensive software like Photoshop to make custom overlays.
An overlay for a live video production is simply an image or video that appears on top of or over your video feed. While it could be full screen, most overlays are partially or even mostly transparent so that the resulting effect is a graphic or video that your audience can see as well as your camera feed. Like this:
As you can see, my audience is able to see me but instead of just a talking head, my video has additional information and branding incorporated for a truly professional live video production.
In 7 easy steps, you’ll learn how to quickly create overlays, banners, tickers, and more with just a few clicks in Singular.live.
“Learn how you can create super slick on-air graphics all from your browser.”
What is Singular.live?
Singular.live is a powerful overlay platform where you can create cloud-based graphics.
That means you can beam creative assets to your live show like teasers for upcoming segments, scoreboards, tickers, and more.
It’s perfect if you live stream with Ecamm Live, OBS Studio, or use OBS Virtual Cam.
Let’s get started!
Step 1. Create your free account.
First, you’ll need to register for a free account with Singular.live. Go to https://app.singular.live/users/signup to get started.

Step 2. Navigate to your dashboard.
Navigate to the Singular Dashboard: https://app.singular.live/dashboard and open up your Account folder in the left panel and click on “Library”.

Step 3. Download a theme from the Marketplace
Select “New” from the drop down menu at the top left corner of the dashboard. Then select “Singular Market.”

A modal window will appear featuring free themes available in the Marketplace. Choose the theme you like best and click the download icon.
For this tutorial, I chose the Beauty Start theme.
Once you’ve downloaded your theme, it should appear in the left panel under “Library.”
Step 4. Open your theme in Studio.
To customize your theme, go to your dashboard and click on your theme from the left panel. In the center of your screen, you should see your theme listed under “Composition.”
Right-click the theme and select “Open with” and choose “Studio” from the modal window, give it a name, and click “Create”. Studio will now open in a new tab.
For this tutorial, I named mind “LCL Live Demo 1.1.”

“Studio is a Control Application that you will use to operate your live overlays.”
Step 5. Choose your overlays and start editing.
With Studio open, you will see the Playlist panel on the far left. You can auto populate all of the overlays included in the theme by clicking the three dots on the upper right hand corner and selecting “Auto Playlist”.

From there, you can delete which overlays you do not want to use.
For this tutorial, I’ll show you how I created my playlist one overlay at a time.
Directly underneath, select “Click here to Add Overlay” and choose “Global Data.”

In the “Overlay Editor”, you can edit the template to use your branded colors throughout the entire Playlist.

Next, add a new overlay from the Playlist Panel. In this example, I wanted a countdown timer and chose the overlay “Fullscreen - Title Card”.

To update the logo, I went back to my Dashboard then clicked on “Assets” from the left panel.
From the drop down menu on the upper left hand corner, select “Upload” and choose your logo from your desktop.

Once your logo has uploaded, double click on the file in the Dashboard so that the file opens in a new tab. Copy the file url and go back to the Overlay Editor in the Studio to paste the link.Continue to edit the following fields as necessary.
Pro Tip: Make sure to frequently use the blue "Update" button in the Overlay Editor if you are not seeing any changes to your overlay contents that you update on-air.
A preview of your edits will appear in the Preview Window.
Step 6. Load your on-air graphics in Ecamm Live.
For the purpose of this tutorial, we will use Ecamm Live for our live video production. You can download a free trial of Ecamm Live here.
6.a In Studio, click on the “Share” button on the upper right-hand corner. In the field “Render Window Size”, select 1080p (1920x1080) from the drop down menu.

Next copy the Output URL and open Ecamm Live.
6.b In Ecamm Live, go to Overlays > New Widget Overlay in the navigation menu. In the Widget overlay window, enter a Display Name. For this tutorial, I named mine “Singular”.

Next, paste the Output URL that you copied from the Singular.live Studio.
Then edit the Widget Options so that the width is 1920x1080.
Make sure to check the box “Fill the Entire Frame.”
Finally, set the frame rate to 30 FPS and save.
Step 7. Broadcast your on-air graphics.
To play the overlays you created in Singular.live, you’ll go back to the Studio and Playlist panel. From there click the play icon next to the overlay that you want to display in Ecamm Live.

But Stephanie, what about the watermark?
Easy. Create an overlay to cover the watermark.
Pro Tip: Add a timer for each overlay and leave Auto Advance on so that your overlays will transition to the next overlay.
If you have any more questions on how to get your Singular overlays into OBS, check out this video. If you are already using another encoder in your production workflow, click here to learn how to use Singular overlays with the software of your choosing.
If you want this level of live video production for your brand or business, but don’t have the time to invest in learning yourself, why not consider utilizing a remote live producer?
Restream Giveaway
Enter for a chance to win a year access to Restream Professional ($490 value)!
What is Restream?
Restream allows you to broadcast live video to 30+ social networks at the same time.


Deadline to enter is Sunday, June 14, 2020 at 11:59 pm PST.

you might also like:


DISCLAIMER: This website contains affiliate links, which means that if you click on one of the product links, I receive a small commission. This assures that we can continue bringing you valuable content. Thank you for supporting Lights, Camera, Live! We only link to products we use or are highly recommended by trusted sources.
